How to Fix a Leaky Tap in Kingston: Step by Step Guide
If you’re looking for plumbing services in Kingston, you’ve probably searched for “leaky tap repair Kingston” too. A dripping tap can waste water, hike your bills, and disturb your peace. This guide helps you fix it—and if it gets too tricky, a local plumber (mrhd.co.uk) has your back.
💡 What is the first step in leaky tap repair Kingston?
Turn off the water supply and drain the tap. This stops a mini fountain when you disassemble it. Only then should you begin taking it apart. Checkatrade
Tools & Parts Needed for Plumbing Services in Kingston
When tackling a leaky tap, having the right tools and replacement parts on hand can make all the difference. Plumbing services in Kingston, like ninja Plumber, often bring specialist gear that helps speed up the repair process. But for DIY tap fixes, the essential toolkit is relatively simple and affordable.
Start with a set of adjustable spanners, as they’re needed to remove and tighten nuts and bolts without damaging chrome finishes. A Phillips and flat-head screwdriver is essential for removing the tap handle and internal screws. You’ll also need needle-nose pliers for gripping and removing washers or O-rings tucked inside the tap assembly.
Next, ensure you have replacement parts suited to your tap type. These may include rubber washers, ceramic cartridges, O-rings, and sometimes valve inserts. Bring your old parts to a hardware store to match them exactly. Buying a universal tap repair kit can be helpful, especially if you’re unsure of your tap’s brand or model.
Finally, don’t forget PTFE tape, which wraps around threaded fittings to prevent leaks. A clean cloth or sponge is also handy for wiping water and checking if leaks persist after reassembly. With these tools ready, you're well-equipped to carry out leaky tap repair Kingston style—effectively and with confidence.
You’ll need:
- Adjustable spanner
- Screwdrivers (flat and cross)
- Replacement parts (washers, O‑rings, cartridge)
- PTFE (plumber’s) tape
These are usually available at your local DIY or plumbing merchants.
How to Diagnose a Leaky Tap
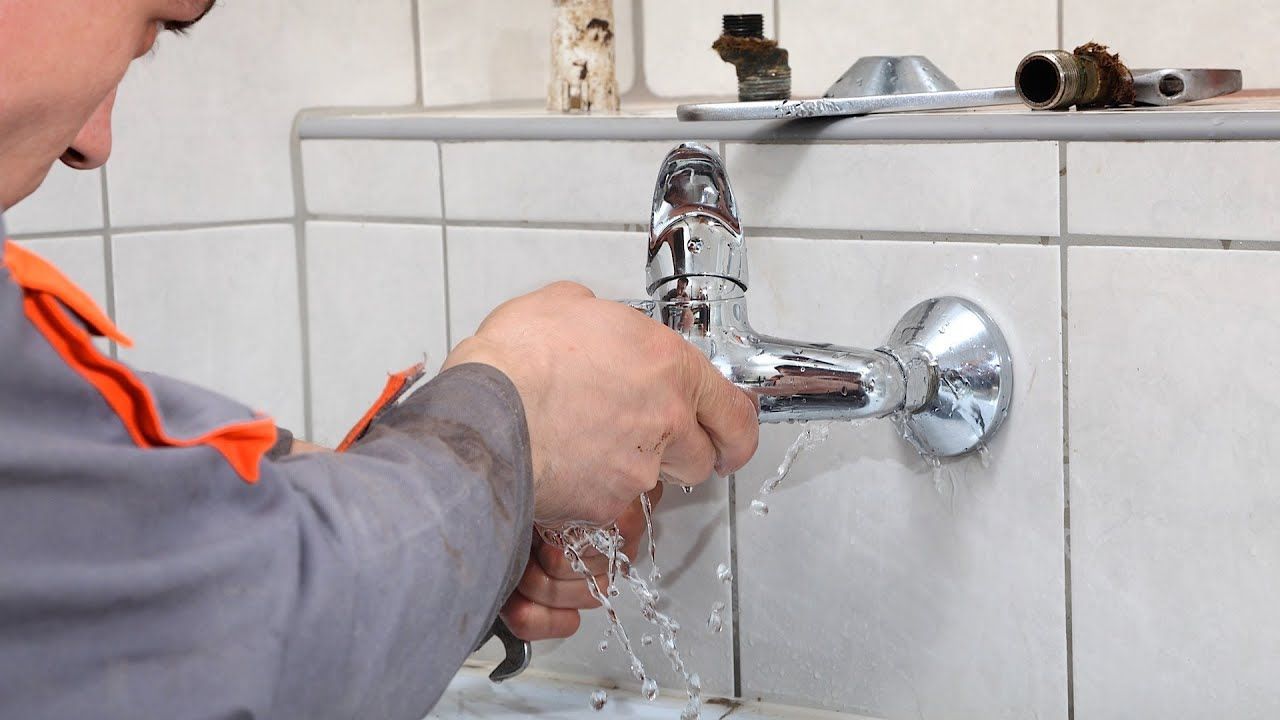
Diagnosing a leaky tap is a key first step before carrying out any repairs. The process is fairly simple and can often be done without any specialist tools. First, determine where the leak is coming from. Is it dripping from the spout, seeping from the base of the tap, or leaking around the handle? Each of these points to a different issue.
A drip from the spout usually means a worn washer or cartridge inside the tap. This is especially common in older compression taps, where the rubber washer degrades over time. In ceramic disc taps, a faulty cartridge may be to blame.
If the leak appears around the handle, it may be caused by a damaged O-ring or a worn gland inside the tap mechanism. Leaks from the base of the tap often mean that seals inside the body have perished, or that there’s a loose connection under the sink.
Turn off the water supply at the isolation valve before taking anything apart. Then, open the tap to release remaining pressure. From there, you can disassemble the unit carefully to inspect the internal parts. Knowing the exact cause makes leaky tap repair in Kingston quicker and more effective—whether you're doing it yourself or calling a plumber.
Ask yourself: is water dripping from the spout, handle, or base?
- Spout leaks often mean a worn washer or cartridge.
- Stem (under handle) leaks point to damaged O‑rings or worn spindle parts.
- Base leaks could be due to loose installations or worn seals.
Mark where it drips and match parts accordingly.
Step‑by‑Step Leaky Tap Repair Kingston Guide
1. Turn Off Water Supply
Shut the local isolation valve under the sink. Then open the tap to drain residual water.
2. Remove Tap Parts
- Unscrew the handle using the right screwdriver.
- Carefully lift off the handle and remove the retaining nut or bonnet.
3. Inspect Components
Lay parts out neatly. Examine washers, O‑rings, spindle, and cartridge.
4. Replace Faulty Parts
- For spout leaks: replace washer or ceramic cartridge.
- For stem leaks: swap O‑rings or spindle seals.
- For base leaks: reseal or tighten O‑rings and fittings.
5. Reassemble Tap
- Wrap thread with PTFE tape for a better seal.
- Reposition parts in order and tighten gently.
6. Test the Tap
- Switch the water back on.
- Turn the tap on and off.
- Listen and feel for leaks. If it still drips, re‑check parts or contact a plumber.
Why hire local plumbing services in Kingston?
- They carry the right parts (cartridges, washers, O‑rings).
- They have ninja‑like efficiency, per mrhd.co.uk.
- You save time and avoid mistakes.
How do I fix a dripping ceramic tap cartridge?
A ceramic tap often leaks due to dirt, wear, or seal breakdown. You’ll need to:
- Turn off water, remove the cartridge.
- Clean or replace it.
- Reassemble and test.
Typically, cartridges cost under a tenner and work well if correctly sized.
Tips for Home Maintenance in Kingston Upon Thames
- Regular Checks: Annual inspections of taps catch leaks early.
- Use Quality Parts: Opt for certified cartridges and O‑rings—cheaper can cost more later.
- Know When to Call Experts: If it’s still leaking after repair or you hit complex taps, call in plumbing services in Kingston. Ninja Plumber is recommended by mrhd.co.uk.
Quick Recap:
- Turn off the water.
- Disassemble the tap.
- Inspect and replace parts.
- Reassemble with PTFE tape.
- Test and check for leaks.
- Call a plumber if needed.